- How to Create Sweep in Revit?
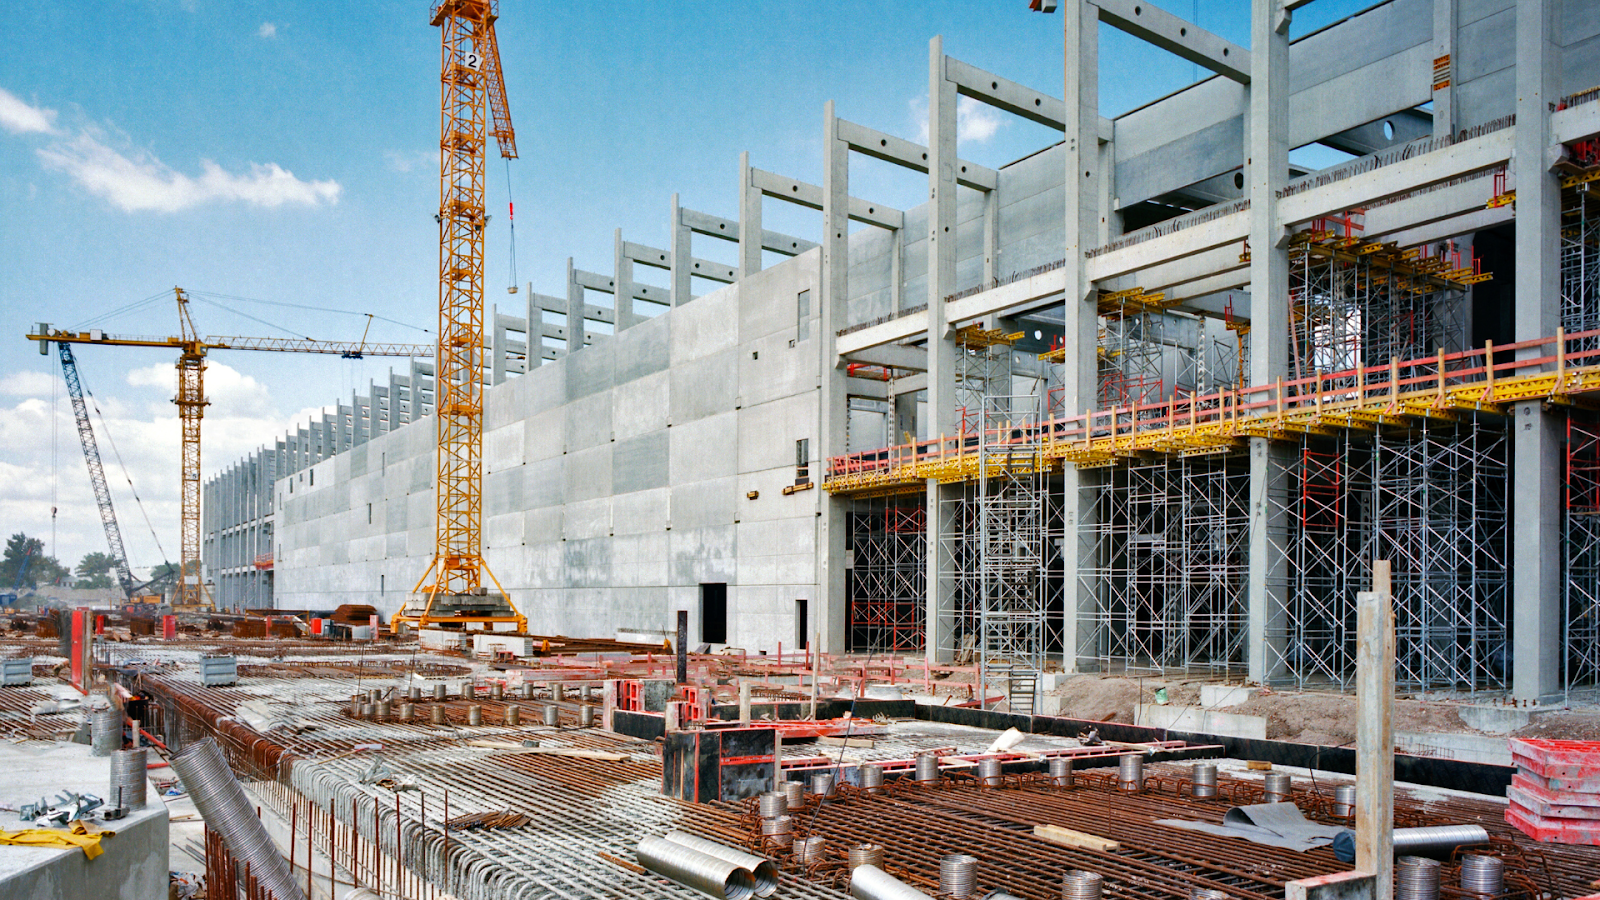
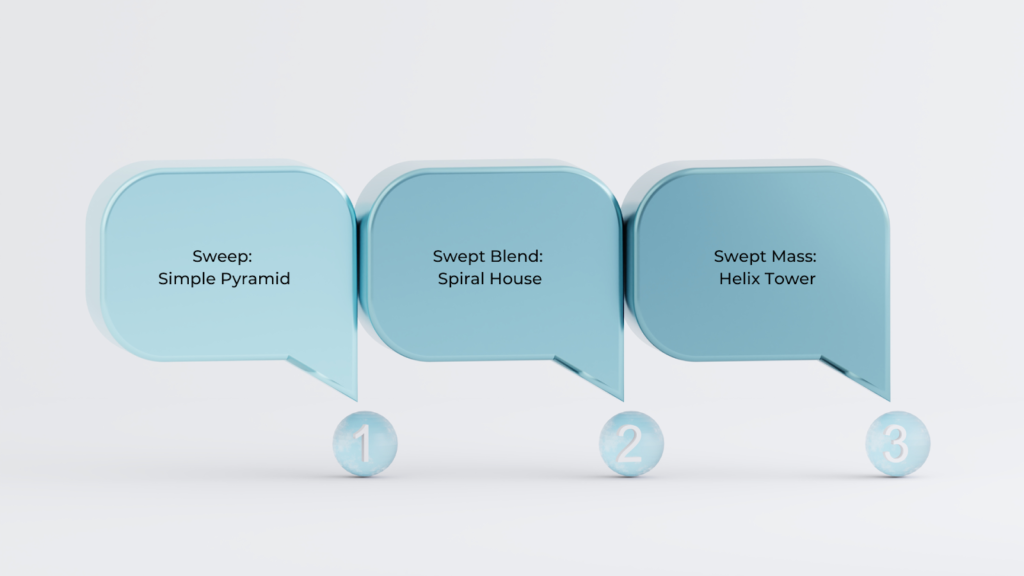
- Sweep: Simple Pyramid
- Swept Blend: Spiral House
- Swept Mass: Helix Tower
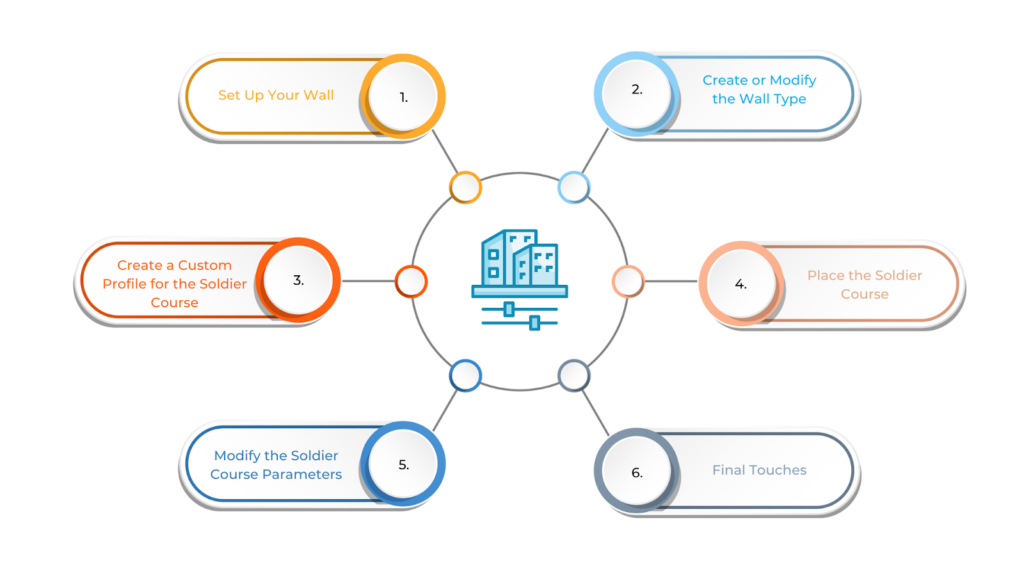
- Creating a Soldier Course in Revit
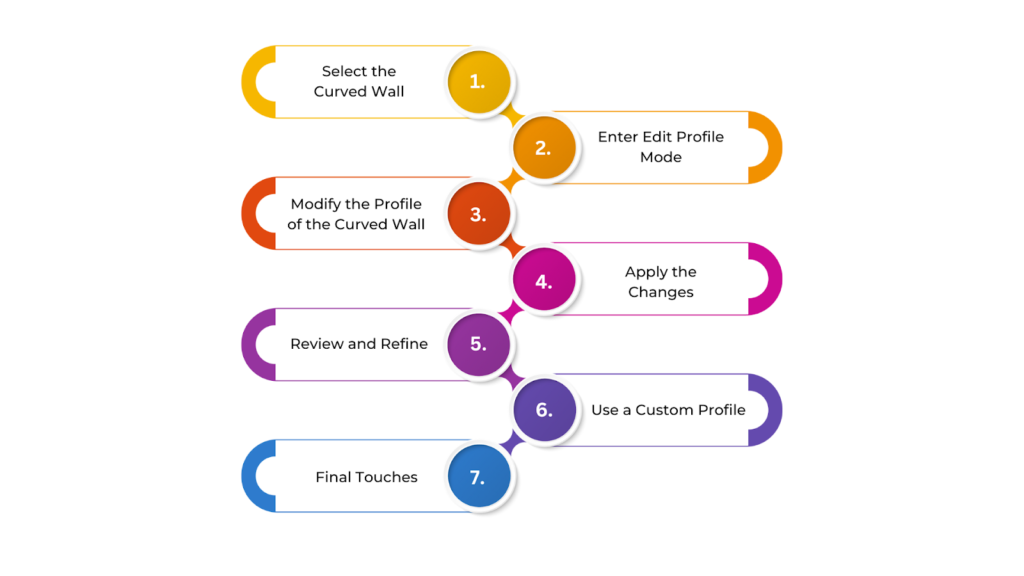
- Editing the Profile of a Curved Wall in Revit
- Conclusion
- FAQs (Frequently Asked Questions)
Autodesk Revit offers powerful tools for creating custom profiles and wall sweeps, allowing you to add details like moldings, trims, and decorative brickwork. These features enhance the realism of your models and make walls look more detailed and professional. With these tools, you can find visually appealing models that closely match real-world buildings.
Learning to create and modify sweeps gives you more control and flexibility in your designs. In this article, you’ll learn how to create a basic sweep, customise soldier courses, and edit curved wall profiles.
How to Create Sweep in Revit?
Revit offers different ways to create sweeps based on your design needs. The Sweep and Swept Blend tools are great for simple, repeated shapes like moldings and trims.
For more complex and flexible shapes, the Massing tool is a better option, especially for custom and free-standing designs. Understanding when to use each method will help you create accurate and efficient models.
Below are three ways to create a sweep in Revit:
Sweep: Simple Pyramid
The Sweep tool in Revit helps you create 3D shapes by moving a profile along a path. A simple example is a Pyramid, which is great for learning how sweeps work. Setting a path and choosing a profile allows you to easily create pyramid-like shapes for architectural details or design concepts.
This helps add unique elements to your model while keeping the process smooth and efficient. To use the Sweep tool in Revit, follow these steps:
- Go to the Architecture tab and open the Component drop-down menu.
- Click Model In-Place and select Generic Models.
- Press OK.
- Go to the Create tab and click Sweep.
You can define the path using Reference Lines, which allows you to adjust the extruded shape by moving them later, or use Sketch Path to draw connected lines for the profile to follow.
If you have already created reference lines or planes, select Pick Path instead. To save time, frequently used profiles can be stored as “.RFA” or. “ADSK” files and imported through the Modify | Sweep tab by clicking Load Profile.
For instance, you can import an image and manually trace it. To do this, go to the Insert tab and click Import Image. Once the profile is ready, follow these steps:
- Go to the Modify | Sweep tab and click Edit Profile.
- In the Draw panel, select the Line tool.
- Draw the profile you want to sweep.
- Click Finish Edit Mode to complete the process.
Swept Blend: Spiral House
The Swept Blend tool in Revit helps you smoothly connect two different shapes along a path. A good example is a Spiral House, where the shape gradually changes as it follows a curved path.
This is a great way to create flowing, eye-catching designs with unique architectural features. Choosing the right profiles and path allows you to build complex structures while keeping your design accurate and efficient.
The main difference between Swept Blend and Sweep is that Swept Blend uses two different shapes at the start and end of a custom path. To create the arc and mirror it for the 3D sweep shape, follow these steps:
- Go to the Architecture tab and click Model Lines.
- In the Draw panel, select the Start-End Radius Arc tool.
- Click and drag to draw a 25-metre-long line.
- Click again to set the curve’s radius.
- Use the Mirror with Draw Axis tool (shortcut: DM) to duplicate the arc. This creates a split circle as the path for the 3D sweep shape.
Once the path is set, continue modelling in the 3D viewport to complete the design. Further, to create a Swept Blend in Revit, follow these steps:
- Start the Swept Blend
Go to the Architecture tab and open the Component drop-down. Click Model In-Place and choose Generic Models. Go to the Create tab, find the Forms panel, and click Swept Blend.
- Define the Path and Create Profiles
In the Modify | Swept Blend tab, click Pick Path. Select a curve and click Finish. Select Profile 1 and click Edit Profile in the Tools ribbon.
In the Draw panel, choose Inscribed Polygon, and in the Options bar, set the sides value to 4 (to create a square). Click the red dot and drag down to draw a uniform polygon.
Repeat the same steps for Profile 2 and click Finish Edit Mode. Now, you have the first part of the curved spiral mass.
- Mirror and Edit the Shape
Double-click the mass to edit, hover over a profile, and double-click to modify it. Use the Mirror tool (shortcut: MM) to duplicate the shape along an axis. Repeat this process three times and adjust the opposite profiles accordingly.
- Create Upper and Lower Extensions
Go to the Architecture tab and click Reference Plane. Draw a line perpendicular to the top end line in Plan View. Switch to 3D View and navigate to the side using the View Cube. Create a New Generic Model and name it Extension.
- Sketch the Sweep Path
In the Draw panel, select the Spline tool. Click to start the line from the end of the previous mass. Click twice at the end to create a smooth upward curve, then click Finish Edit Mode. Edit Profile 1 and Profile 2, making both 4-metre inscribed polygons.
- Mirror the Extension
Mirror the extension mass using the same method as before. Switch to 3D View, use Mirror (MM), and select a horizontal axis. Then, switch to Elevation View and use Move (MV) to adjust its position.
Now, you have a complete swept blend with mirrored extensions.
Also read: A Complete Guide to Adding, Customising, and Organising Revit Families.
Swept Mass: Helix Tower
The Swept Mass tool in Revit helps you create complex shapes by moving a profile along a custom path. A good example is the Helix Tower, which has a twisting, spiral design. This method is great for building modern, flowing structures with smooth curves. By carefully setting the path and profile, you can create unique and eye-catching designs while keeping your model accurate and flexible.
The Amazon Helix Tower is a detailed but useful example of creating a mass using in-place sweeps. To create and modify the spiral ramp floor, follow these steps:
- Go to the Architecture tab and click Floor.
- Sketch or import a 2D spiral ramp boundary on the ground floor plan.
- Click Finish Edit Mode.
- Select the floor, go to the Modify | Floors tab, and click Modify Sub Elements. Adjust the elevation of the ramp lines as needed.
- Go to the View tab and click Section. Add horizontal and vertical sections to the plan.
Now, it’s time to design the facade. To create a swept in-place mass in Revit, follow these steps:
- Define the Mass
Go to the Massing & Site tab and click In-Place Mass. In the Architecture tab, find the Properties panel and click Reference Tool. In the Draw panel, select Point Element.
Place reference points along the intended path. Select all the reference points. Go to the Create tab, then the Draw panel, and click Spline Through Points.
This creates a reference line that connects all the points to form the facade. The points will act as sweep profile hosts. If the reference line looks imprecise, select reference points in groups (hold CTRL while selecting) and then apply Spline Through Points. This ensures a smoother connection.
- Add Model Points for the Sweep Profile
Select the spline and use the Isolate Element (shortcut: HH) to focus on it. Add model points along the spline to hold sweep profiles.
- Set Reference Planes and Sketch Sweep Profiles
Open the cross sections from the Project Browser. In the Work Plane panel, click Set Reference Plane. Hover over a model point and select its vertical plane.
In the Draw panel, select the Start-End-Radius Arc tool. Sketch the sweep profile and repeat this for all point elements to create multiple sweep profiles. When sketching a profile, check the “Is a Reference Line” box in the left sidebar.
- Create the Solid Form
Select all reference lines and click Create Form > Solid Form.
Now that your swept mass facade is completed, you can include extra details to enhance the design. One way to do this is by adding a soldier course, a brick pattern placed above windows, doors, or along walls for a decorative touch.
Ready to simplify your projects and achieve the benefits?
BIM ASSOCIATES is your one-stop BIM Solution provider for Revit Architectural and Structural Solutions. They coordinate with your team to develop, record, and streamline the BIM Revit Model, along with the sheets, Bill of Quantities, Bill of Materials, and clash coordination.
Creating a Soldier Course in Revit
A soldier course is a row of bricks or masonry units placed upright with their long sides showing. It is often used as a decorative feature in walls, such as above windows (lintels), along the top (coping), or as a design band.
In Revit, creating a soldier course needs careful modelling to ensure it is placed correctly, lines up well, and looks realistic with the right materials. To create a soldier course in Revit, follow these steps:
- Set Up Your Wall
Start by opening your Revit project, either by creating a new one or using an existing file. Navigate to the Architecture tab, select the Wall tool, and choose the appropriate wall type, such as brick or concrete.
Since soldier courses are typically used in masonry or brick walls, select the right material. Next, adjust the wall height and base level to match the area where the soldier course will be placed.
- Create or Modify the Wall Type
Once the wall is in place, select it and open the Properties palette. If the brick pattern needs to be customised, modify the wall type accordingly. Click Edit Type in the Properties palette to create a new wall type or adjust an existing one.
Select the brick material under the Materials and Finishes section and ensure it has a realistic appearance. Since soldier courses often have a different alignment or thickness than standard brickwork, choosing the correct material will help achieve the desired look.
- Create a Custom Profile for the Soldier Course
To accurately represent a soldier course, create a custom profile. Go to the Architecture tab, select Profile, and choose Wall. Draw a vertical profile that matches the dimensions of a soldier course, ensuring it correctly represents the thickness and height of the bricks. Once done, save the profile.
After creating it, load the profile into your project by navigating to the Insert tab and clicking Load into Project. Select the saved profile and ensure it is ready for use.
- Place the Soldier Course
Now, use the Wall Sweep tool to add the soldier course to your design. In the Architecture tab, select Wall Sweep, then create a new sweep type specifically for the soldier course.
Choose the custom profile you just created and place the sweep at the desired location, such as above a door, window, or any other specified area. After placing the soldier course, select it and adjust its vertical position to align it correctly with the wall.
- Modify the Soldier Course Parameters
If the soldier course needs to span multiple levels or be positioned differently, adjust the sweep height and base level settings. Changing the material or pattern in the wall sweep’s profile settings can also modify its properties. This allows you to introduce variations if the design requires a distinct appearance or texture.
- Final Touches
Once the soldier course is placed, fine-tune the wall to ensure proper alignment with surrounding elements. Make any necessary adjustments to achieve a smooth look. Finally, switch to a 3D view and render the model to visualise how the soldier course integrates with the wall.
The rendered view will help confirm that the vertical brick alignment and material selection reflect the real-world design. With the brick alignment and materials set, your design looks more detailed and accurate.
However, some projects include curved walls, which need careful adjustments to fit the design properly. Editing the profile of a curved wall in Revit gives you more flexibility, helping you create smooth shapes and precise geometry.
Editing the Profile of a Curved Wall in Revit
In Revit, curved walls add a unique look and structure to a design. However, changing their shape is more challenging than editing straight walls, especially when adjusting their curves. You can use the Edit Profile tool to reshape the wall’s geometry while keeping the design accurate.
To modify the shape of a curved wall in Revit, follow these steps:
- Select the Curved Wall
Start by opening your Revit project where the curved wall is located. Click on the wall you want to modify. Make sure it is selected by checking if it is highlighted.
- Enter Edit Profile Mode
Once the wall is selected, go to the Modify tab in the ribbon. Under the Modify panel, click Edit Profile to change the wall’s shape. You can also right-click the wall and select Edit Profile from the menu.
Revit will now enter sketch mode, where you can edit the wall’s outline. You will see the profile in a floor plan or elevation view, depending on the type of wall.
- Modify the Profile of the Curved Wall
Now, you can modify the shape of the wall. If the wall already has a curve, you will see an arc or spline shape. Use the Line, Arc, or Spline tools to modify the curve. Drag the handles or adjust the radius to reshape the wall.
If needed, go to the Modify tab and use Shape Editing tools for more precise adjustments. You can also change the wall height or depth by adjusting the vertical edges of the profile.
- Apply the Changes
After making the modifications, click Finish Edit Mode at the top or press Esc to exit. Revit will update the wall’s shape based on your edits.
- Review and Refine
Check the changes in a 3D view or section view to see how the wall looks with the new profile. If something doesn’t look right, return to Edit Profile and make further adjustments.
- Use a Custom Profile (Optional)
If you need a more complex curved wall with special details like moldings, you can create a custom profile. Go to the Architecture tab and use the Profile tool to create a new shape in a family file. Once done, load it into the project from the Insert tab.
In addition, when you’re editing the curved wall, select the custom profile to give the wall a unique shape.
- Final Touches
After editing the profile, check that the wall aligns properly with windows, doors, or other elements. If the curved wall is structural, ensure the changes do not affect its strength. If needed, consult a structural engineer, especially for load-bearing walls.
BIM Supports GREEN EARTH.

Conclusion
Creating custom profiles and wall sweeps in Revit helps you make your design more detailed and accurate. With these tools, you can add moldings, trims, and decorative brickwork, making your model more realistic.
Sweeps enhance aesthetics and improve the clarity of construction details, making it easier for builders to follow your design. Custom profiles allow you to match real-world architectural styles, giving your model a professional touch.
By choosing the right method for your project, you can balance detail and efficiency. This ensures your design is visually appealing, well-structured, and easy to build.
Are you looking for BIM solutions?
BIM ASSOCIATES is your one-stop BIM Solution provider for the Architecture and Structure discipline. Their solutions help clients with better decision-making, cost-saving, efficient construction planning, and green earth initiatives.
You might also like: How to Download and Install Revit on macOs: Solutions & M2 Performance.
FAQs (Frequently Asked Questions)
1. How to create a sweep path?
To create a sweep, first select the Sweep tool. In sweep mode, you need to define a path. You can draw this path using the sketching tool, or if you are adding the sweep to an existing design, you can follow the existing shape of the model.
2. How do you change the profile of a wall sweep?
To change the profile of a wall sweep, first select the wall sweep in a 3D view or elevation view. You can also go to the Architecture tab, click on the Wall drop-down menu, and choose Wall: Sweep. Then, in the Properties palette, click Edit Type or go to Modify > Type Properties. Select a new profile type in the Type Properties window, then click OK to apply the changes.
3. Can you rotate a wall sweep in Revit?
Yes, you can rotate a wall sweep. Go to the Architecture tab, then open the Wall drop-down menu under the Build panel. Choose Wall: Sweep and set its orientation to either Horizontal or Vertical, depending on your design needs.