
More than 5,294 companies worldwide have adopted Autodesk 3ds Max for 3D modelling in 2025, proving its popularity and reliability. One of its main uses is interior design, helping you create realistic and detailed spaces.
Making a lifelike bedroom in 3ds Max takes creativity, technical skills, and attention to detail. Every part, from the walls to the furniture, should fit together to create a balanced and attractive design.
This process includes careful planning, accurate modelling, and fine-tuning textures, materials, and lighting to make the space functional and realistic. By following a step-by-step process, you can turn a simple 3D model into a well-designed bedroom that feels both functional and aesthetically appealing.
In this article, you’ll learn the complete workflow needed to create stunning bedroom interiors in 3ds Max.
Understanding Bedroom Interior Design with 3ds Max
3ds Max is a powerful tool that helps you create detailed 3D models, realistic textures, and lifelike renders. It allows you to design furniture, beds, wardrobes, and decorations with high precision. Advanced lighting and shadow effects make the scenes look natural and immersive.
3ds Max also offers powerful camera controls and rendering tools, allowing you to create high-quality, photorealistic bedroom interiors with precision.
If you want to create a realistic and functional bedroom design in 3ds Max, focus on key elements such as:
| Elements | Key Details |
| Furniture Modelling | Creating beds, nightstands, wardrobes, and other furniture using basic shapes and modelling tools. |
| Materials & Textures | Adding realistic colours and patterns to surfaces like floors, walls, and fabrics. |
| Lighting & Mood | Using natural and artificial lights to create a warm, cosy, or modern feel. |
| Camera Angles | Setting up the best views to showcase the bedroom from different perspectives. |
| Rendering & Editing | Improving the final image with high-quality settings and touch-ups in programmes like Photoshop. |
A well-designed bedroom interior starts with thoughtful planning, ensuring the space is visually appealing and practical. Defining the layout, selecting a style, and considering key design elements sets the foundation for an efficient 3D modelling process.
Also read: SD, DD, and CD Drawings Explained for Successful Construction.
Planning Your Bedroom Design
Designing a bedroom interior takes thoughtful planning, creativity, and attention to detail. You can use 3ds Max to try out different layouts, styles, and furniture arrangements before settling on a final design.
A well-thought-out plan ensures a realistic and functional space. The key steps in the planning phase include:
- Analysing the Space and Planning the Layout
Before beginning the design, it’s essential to assess the space and figure out the best way to use it. This involves:
- Measuring the room to make sure furniture fits appropriately.
- Identifying key features like windows, doors, or special walls.
- Think about how people will move around and ensure enough space for easy movement.
- Dividing the room into areas for sleeping, storage, and relaxation.
- Choosing a Realistic Style for the Bedroom
The style you choose for your bedroom significantly affects its mood and how well it works. Some popular bedroom styles are:
| Bedroom Styles | Key Details |
| Modern Minimalist | Simple lines, neutral colours, and practical furniture. |
| Luxury Classic | Fancy details, warm lighting, and high-quality materials like marble and wood. |
| Scandinavian | Light colours, natural textures, and cosy touches. |
| Industrial | Exposed brick, metal, and dark colours for a modern look. |
| Bohemian | A mix of patterns, textures, and unique decor for a laid-back feel. |
- Selecting Elements and Furniture to Include in the Design
After choosing a style, you should pick the right furniture and decor to improve the overall look. Important bedroom elements include:
| Bedroom Styles | Key Details |
| Bed & Headboard | The main piece of furniture designed for comfort and style. |
| Wardrobes & Storage Units | Providing storage without making the room feel cluttered. |
| Lighting Fixtures | Using different types of lighting to create the right mood. |
| Curtains & Rugs | Adding texture and warmth to make the room feel cosy. |
| Wall Art & Accessories | Adding personal touches with decorative items. |
- Colour Scheme & Material Selection
The colours and materials should match the style you’ve chosen. Keep a few things in mind, such as:
- Light, neutral colours make the room feel more open and airy.
- Darker, richer colours create a cosy and luxurious vibe.
- Textured materials like wood, leather, and fabric add depth and interest.
Choosing the right colours and materials helps establish the bedroom’s mood and character, but bringing the design to life requires a structured approach in 3ds Max.
Looking for the best 3ds Max tools to enhance your workflow?
BIM ASSOCIATES helps you 3D-model your objects, furniture, buildings, and landscapes and enables you to create scenic renders and videos.
Setting Up Your Bedroom Interior Design Project in 3ds Max

Before starting the modelling process, you must set up your 3ds Max project correctly to help run everything smoothly. This includes organising project files, setting the right measurement units for accurate sizing, and adjusting the viewport for better visibility.
A well-organised setup makes it easier to work on modelling, texturing, lighting, and rendering, leading to a more realistic and professional bedroom interior design. The key setup steps include:
- Configure Initial Project Settings
Setting up the right options from the beginning ensures everything works smoothly and accurately. First, go to Customise > Units Setup and choose the correct measurement system (centimetres, inches, or metres).
Then, adjust the grid spacing to match the scale of your bedroom design. Ensure the viewport settings are set up for clear visibility and easy navigation. Lastly, turn on auto-save to avoid losing your work if the system crashes.
- Import Reference Images and Blueprints
Using reference images helps maintain accurate proportions. To do this, load blueprints or sketches onto a plane using the Material Editor > Bitmap.
Make sure to scale and align the images properly to match real-world sizes. You can also use different viewports (top, front, and side views) to help with precise modelling.
- Organise Layers and Groups for an Efficient Workflow
Managing objects well makes the design process smoother. Organise different parts, such as walls, furniture, decor, and lighting, in separate layers. Use Groups to combine related items (like a bed, headboard, or table and lamp) to make them easier to work with.
You can also freeze or hide background references and unnecessary elements so you can focus on the areas you’re currently working on.
- Set Up the Bedroom Scene and Environment
Setting up the scene properly helps you see the space clearly. Start by creating walls, floors, and ceilings to shape the bedroom’s structure. Adjust the camera angles to get the best views for rendering. Add basic lighting to mimic natural and artificial light before making final tweaks.
- Create a Structured Project Folder
Organising files makes them easier to find and update. You can create separate folders for models, textures, renders, and reference images. Use Save As > Incremental Save to keep different versions of your work and track progress. Back up your project files often to cloud storage or an external drive to keep them safe from loss or damage.
By following these steps, you can keep your workflow organised, model efficiently, and create high-quality renders for your bedroom interior design project in 3ds Max. With everything set up, the next step is to shape the bedroom’s structure.
Modelling the Basic Geometry of the Bedroom in 3ds Max
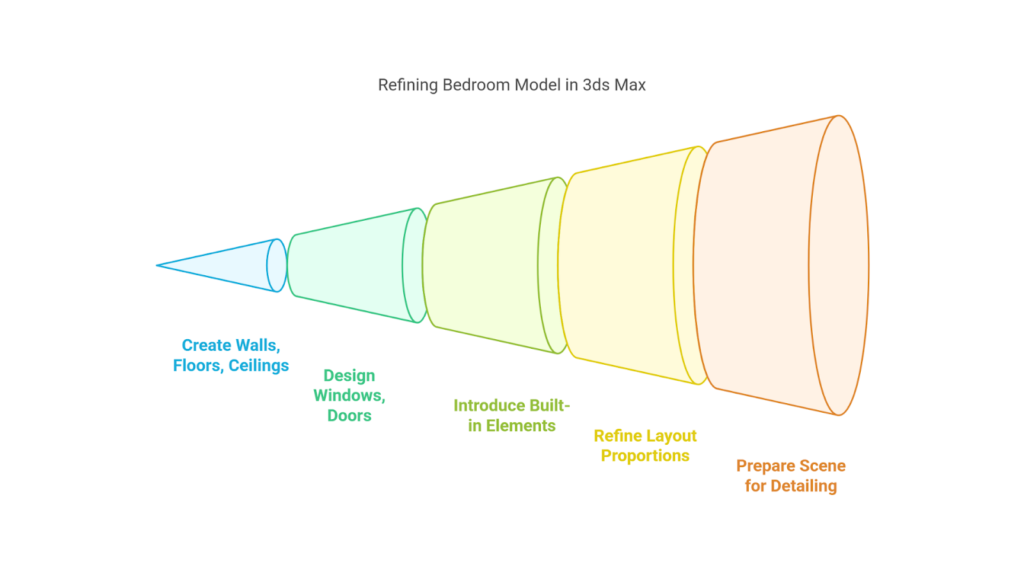
To create a bedroom in 3ds Max, start by modelling its basic shape. Getting the size and proportions right early helps make the interior look realistic and visually appealing. This includes defining key elements like walls, floors, and ceilings before adding essential details. Here are the main steps:
- Creating Walls, Floors, and Ceilings
The first step in modelling a bedroom interior is to set up the room’s structure. Use tools like Box, Plane, or the Extrude Modifier on a Spline to create walls with the right thickness.
Then, create a Plane or Box for the floor and adjust its size to match the room. Duplicate the floor or create a new plane for the ceiling, ensuring it’s at the correct height for placing lights.
- Designing and Placing Windows and Doors
Doors and windows play an important role in natural light, ventilation, and the overall design of the room. To add them, use the Boolean or ProBoolean Modifier to create openings in the walls.
Model window frames and glass panels using Editable Poly tools and apply transparent materials for a realistic look. Also, design detailed door frames and panels and add handles and hinges to enhance realism.
- Introducing Built-in Elements Like Cabinets and Closets
Built-in furniture helps add storage and makes the bedroom more functional. Use Box modelling techniques to create wardrobes, cabinets, and shelves. Add shelves, drawers, and compartments inside closets to make them look more realistic.
In addition, design sliding doors with tracks or hinged doors with pivots, depending on the bedroom style.
- Refining the Room Layout and Proportions
Proper alignment and spacing are important for a balanced interior. Use snap tools and the grid system to align walls, openings, and furniture correctly.
Check measurements against real-world sizes to ensure accurate proportions. Also, leave enough space for easy movement, furniture placement, and natural light.
- Preparing the Scene for Further Detailing
Before starting texturing and rendering, the scene needs to be optimised. You can organise walls, floors, and furniture into separate layers to make editing easier.
In addition, basic materials must be applied to distinguish different surfaces before adding the final textures. Add temporary lights like Omni, Spot, or Directional lights to mimic natural and artificial light from windows, ceiling lights, or lamps. This helps you see how light affects the room before the final rendering.
By following these steps, you can build a well-organised and functional bedroom in 3ds Max. Once the basic shapes are set, you can add details like textures, furniture, and realistic lighting to bring the design to life.
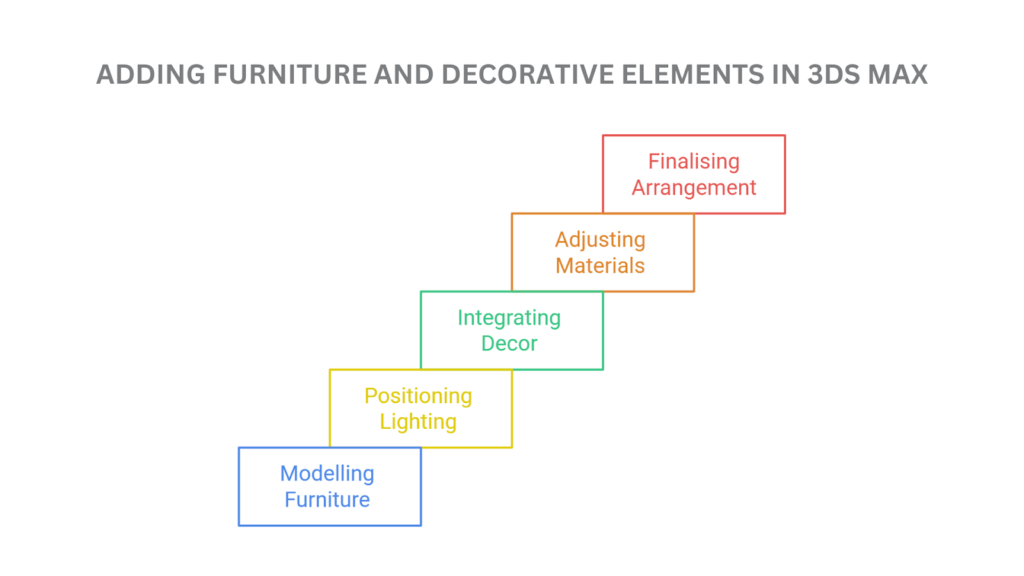
Adding Furniture and Decorative Elements in 3ds Max
After finishing the basic shapes of the bedroom, add furniture and decorations that improve both function and appearance. Furniture defines the space, while lighting and decor add atmosphere, realism, and style.
In 3ds Max, you can create custom furniture, import ready-made items, and apply realistic materials to build a detailed bedroom interior. The steps to add furniture and decorative elements in 3ds Max are as follows:
- Modelling Essential Furniture Pieces
The bedroom layout focuses on key pieces of furniture that provide comfort and usability. Modelling essential elements ensures a functional and visually balanced space. These elements include:
- Designing the Bed: The bed is the main focus of the room. Use box modelling and subdivision techniques to create realistic mattresses, pillows, and headboards.
- Wardrobes & Storage Units: Model wardrobes, nightstands, dressers, and bookshelves in the correct sizes and with built-in storage details.
- Seating & Tables: Add chairs, benches, or a work desk from the 3ds Max Asset Library or model them manually using Box Modeling, Spline Modeling, or Editable Poly tools, ensuring enough space in the room for them.
- Using Ready-Made Models: To save time, you can import pre-made furniture from libraries like 3D Warehouse, TurboSquid, or Autodesk Asset Store instead of modelling everything from scratch.
- Positioning Lighting Fixtures and Accessories
Lighting creates the right mood and makes the bedroom realistic. The strategic placement of lighting fixtures improves the scene’s depth, shadows, and overall ambience. These fixtures include:
- Ceiling Lights & Chandeliers: Use IES lighting profiles in 3ds Max to distribute the light accurately.
- Wall Sconces & Bedside Lamps: Place wall-mounted or table lamps from the 3ds Max asset library in key spots to add soft, ambient light.
- LED Strip & Hidden Lights: For a modern touch, add cove lighting by placing V-Ray Light (V-Ray Light Material), Arnold Emission Shader, or Standard Self-Illumination Materials behind headboards or under shelves.
- Natural Light Optimisation: Place windows and curtains using Editable Poly modelling or import them from the 3ds Max asset library in the right spots to let natural light into the room.
- Integrating Decorative Items for Realism
Adding small details makes the bedroom feel more personal and visually interesting. They improve realism and bring warmth to the space.
You can use elements from the 3ds Max asset library, import them from external sources, or create custom textures using image files. These elements include:
- Wall Art & Paintings: Decorate empty walls with framed digital art, posters, or abstract paintings.
- Curtains & Rugs: Use cloth simulation tools in 3ds Max to create realistic curtains and rugs.
- Throw Pillows & Bedding: Add different fabric textures and folds to pillows and bedding for a cosy look.
- Indoor Plants & Greenery: Add small potted plants, vases, or hanging plants to bring freshness to the room.
- Books, Clocks, and Personal Items: Place realistic items like books, alarm clocks, and candles on nightstands and shelves to make the space feel more lived-in.
- Adjusting Materials and Textures for Realism
Once the furniture and decor are set up, adding realistic materials and textures makes the room look more appealing. Carefully selecting and applying materials improves the depth and authenticity of the scene. These materials include:
- Wood & Metal Finishes: Use PBR (Physically Based Rendering) textures from the 3ds Max Material Library for realistic wood and metal furniture or accents.
- Fabric & Upholstery: Apply soft textures from the 3ds Max Material Library to bedding, curtains, and rugs to make them look more authentic.
- Reflections & Glossiness: Adjust the settings for reflections and glossiness in the Material Editor to get accurate reflections in mirrors, glass, & shiny surfaces.
- Finalising the Arrangement for Composition & Balance
A well-designed bedroom should feel balanced, harmonious, and easy on the eyes. Make sure there’s enough space between furniture for comfort and easy movement.
Arrange furniture and decor in a way that feels balanced and pleasing to the eye. Also, keep the room open and tidy to create a modern, spacious atmosphere.
After setting up the furniture, the next step in bedroom design is adding realistic materials and textures to make the space look real.
Texturing and Material Application in 3ds Max
Adding textures and materials in 3ds Max makes your bedroom look real. This step turns a simple 3D model into a lifelike space, making textures and material application an essential part of the design process.
This improves the design by bringing depth, detail, and authenticity to surfaces. To add textures and materials in 3ds Max, follow these steps:
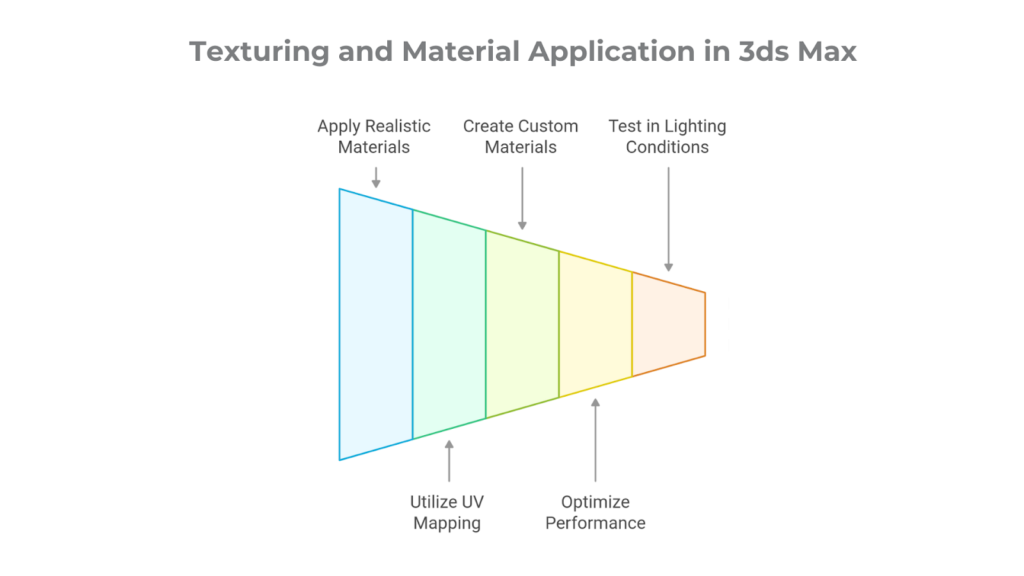
- Applying Realistic Materials and Textures
The materials you choose significantly affect how realistic and attractive the design looks. High-quality textures, proper UV mapping, and reflection settings ensure that surfaces appear natural and visually appealing. The materials include:
- Using Standard & PBR Materials: Use PBR materials with V-Ray, Arnold, or Corona Renderer to create realistic surfaces.
- Wood, Metal, and Fabric Textures: Use high-quality wood, metal, and fabric textures from the 3ds Max Material Library or external sources to improve floors, furniture, curtains, and decor.
- Glossiness & Reflection Adjustments: Adjust shine, roughness, and reflections in the Material Editor using PBR maps for realistic glass, metal, and shiny surfaces.
- Tiling & Scaling: Make sure patterns don’t look repetitive by adjusting the size and rotation of the textures for a smooth, seamless look.
- Utilising UV Mapping for Accurate Texture Placement
Proper texture alignment makes materials look natural on different surfaces. UV mapping helps control how textures wrap around objects, preventing distortions and ensuring smooth application on complex shapes and curved surfaces. Some key techniques include:
- Unwrapping UVs: Use the UVW Unwrap Modifier to place textures correctly on walls, furniture, and decor.
- Avoiding Stretching & Distortion: Adjust the texture layout (UV islands) to avoid stretching, especially on curved or complex surfaces.
- Using UV Packing: Organise the UV maps to make the texture placement and resolution as efficient as possible.
- Real-World Scale Textures: Make sure textures like wood grain, marble, and fabric match their real-life sizes.
- Creating Custom Materials to Enhance the Design
Creating custom materials is essential for a high-quality bedroom. By adjusting properties like colour, reflectivity, roughness, and transparency, you can craft unique materials that add depth and authenticity to the design. Some key techniques include:
- Mixing Multiple Textures: Use Blend Maps (Composite, Mix, or V-Ray Blend Material) in the Material Editor to create a more realistic look by combining wood, fabric, and metal.
- Procedural Textures: Create unique materials like concrete, stone, or patterned wallpaper directly in 3ds Max using Procedural Maps (Noise, Gradient, Cellular, or Tiles) inside the Material Editor.
- Transparency & Subsurface Scattering: Apply these for glass, sheer curtains, and soft fabrics that allow light to pass through. Adjust Opacity, Translucency, or Refraction settings to fine-tune the effect.
- Displacement & Normal Maps: Add texture depth to surfaces like brick walls, leather furniture, and rugs by using Displacement and Normal Maps from the 3ds Max Material Library.
- Optimising Material Performance for Rendering
It’s important to optimise textures and materials to keep things running smoothly. Using efficient techniques helps maintain rendering speed without compromising visual quality. These techniques include:
- Reducing Texture Size: Use compressed, high-quality textures from sources like Quixel Megascans, Poliigon, or Texture Haven to balance visual quality and performance. Resize and optimise textures before importing them, and manage memory using 3ds Max’s Bitmap Paging System and MIP Mapping.
- Instance Materials: Apply Instance Materials in the Material Editor to share the same material across multiple objects, reducing memory usage and improving rendering efficiency.
- Render Engine Optimisation: Adjust material settings based on the best practices for V-Ray, Arnold, or Corona Renderer to make rendering faster. Use efficient reflection/refraction settings, optimise displacement maps, and enable light caching where applicable to speed up rendering without compromising quality.
- Testing and Refining Materials in Different Lighting Conditions
Lighting impacts materials’ appearance in the final render, so testing different setups is essential. Adjusting materials under various lighting conditions ensures accurate reflections, shadows, and colour consistency. Some key techniques include:
- Test Renders in Multiple Angles: Render materials from different camera angles under varying lighting conditions (natural from windows, artificial from ceiling lamps, table lamps, or spotlights). Use real-time preview tools like V-Ray IPR, Arnold RenderView, or Corona IR for quick feedback.
- Adjust Reflectivity & Shadows: Modify Reflection, Glossiness, and Roughness settings in the Material Editor to fine-tune how light bounces off surfaces. Use Fresnel reflections for realistic metal, glass, and polished surfaces.
- Modify Based on Scene Composition: Fine-tune colour, brightness, and texture scale to ensure materials complement the overall bedroom design. Use Color Correction nodes in the Slate Material Editor to adjust hue, saturation, and contrast for better material blending. Modify UVW Mapping and texture tiling for consistent surface appearance.
With textures and materials in place, the bedroom interior now has depth and realism. However, lighting is crucial in improving the atmosphere and making the scene lively.
Lighting the Bedroom Interior in 3ds Max
Lighting is integral to bedroom design because it adds realism, mood, and depth to the scene. Using the right lighting techniques in 3ds Max helps you create natural daylight, artificial lights, and realistic reflections, making the space more inviting and realistic.
The following steps will help you achieve well-lit, immersive scenes:
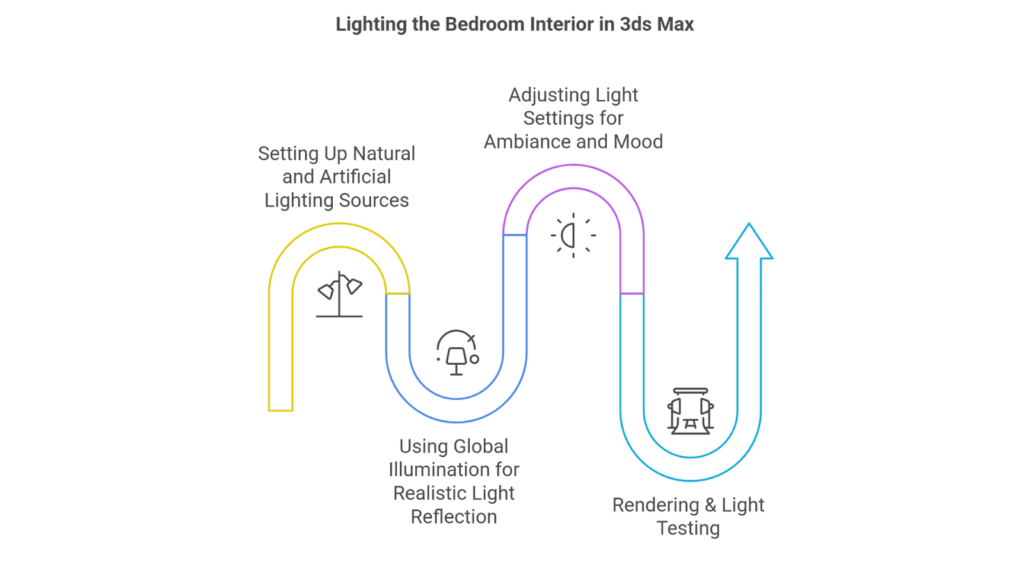
- Setting Up Natural and Artificial Lighting Sources
A well-designed bedroom lighting setup blends natural and artificial light to create a cosy atmosphere. For natural lighting (daylight systems), follow these steps:
- Use V-Ray Sun & Sky or Arnold Physical Sky to create realistic sunlight.
- Adjust the size and position of windows in the Modify Panel to control how much light comes in and where the shadows fall.
- You can also add curtains or blinds using the 3ds Max Material Editor and Opacity Maps to soften sunlight naturally.
And, for artificial light sources, you can follow these steps:
- Use omni lights or spotlights from the Create Panel > Lights to provide overall lighting.
- Use area lights or V-Ray lights from the V-Ray Light Toolbar or Create Panel > V-Ray to create soft, warm lighting.
- Add glowing materials using Self-Illumination in the Material Editor or use V-Ray Light Material for realistic strip lights under furniture and headboards for a modern look.
- Using Global Illumination for Realistic Light Reflection
Global Illumination (GI) makes the scene look more realistic by allowing light to bounce off surfaces, just like it does in the real world. To use GI, follow these steps:
- Enable Global Illumination in Render Settings: Use the GI settings in V-Ray, Arnold, or Corona Renderer to get natural light spread. Adjust primary and secondary bounces for accurate indirect lighting.
- Use Light Portals for Better Light Distribution: In V-Ray, create V-Ray Light Portals from Create Panel > Lights > V-Ray > V-Ray Light, enabling Portal Mode to improve natural light distribution. In Arnold, enable Light Portals in the Arnold SkyDome Light settings. Adjust Light Intensity and Exposure in Render Setup > Exposure Control, V-Ray Frame Buffer (VFB), or Arnold RenderView to fix dark areas.
- Soft Shadows and Light Diffusion: In V-Ray, enable Soft Shadows in the V-Ray Light settings and increase the Size Multiplier for smoother shadows. In Arnold, use Quad Lights or Area Lights and adjust Spread and Softness in Arnold Light Properties. Modify Light Falloff using the Decay Rate settings in the Light Properties Panel for a natural light transition.
- Adjusting Light Settings for Ambiance and Mood
Use warmer light (2700K-3500K) for a cosy, relaxing atmosphere or use cooler light (5000K-6500K) for a fresh, modern look.
You can also dim the lights for a nighttime or calming effect and brighten up areas like desks or reading corners for better focus. In addition, apply Self-Illumination in the Material Editor to make bulbs and LED strips emit light.
In V-Ray, use V-Ray Light Material for realistic glowing surfaces, while in Arnold, apply an Emission shader in the Standard Surface Material. For extra glow effects, enable Bloom & Glare in V-Ray Frame Buffer or Arnold Post Processing settings.
- Rendering & Light Testing
Test renders in the morning, afternoon, and night to see how lighting works in each situation. Adjust the render settings to reduce noise and ensure the image isn’t grainy.
Also, use Photoshop or After Effects to improve brightness, contrast, and shadows for a cleaner, more polished final image.
Fine-tuning brightness, contrast, and shadows in post-processing helps enhance the overall clarity and realism of the render. However, capturing the perfect shot starts with properly setting up and adjusting cameras in 3ds Max to frame the scene effectively and highlight key design elements.
Implementing and Adjusting Cameras in 3ds Max
Proper camera setup and adjustment help showcase the room’s design, layout, and details. Proper camera placement highlights key design elements, controls the depth of field, and creates visually engaging compositions.
Understanding how to adjust camera settings ensures that your final renders effectively showcase the space with clarity and depth.
The steps to adjust cameras in 3ds Max are as follows:
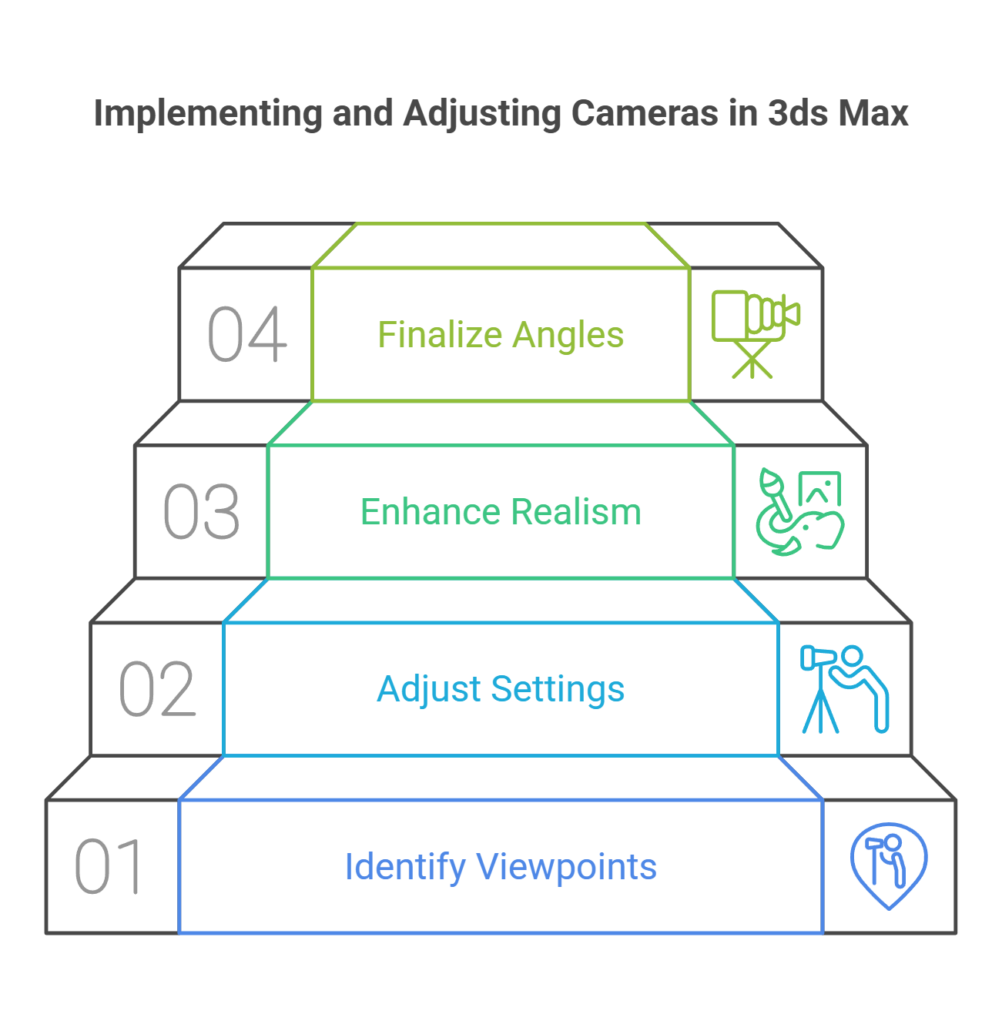
- Identifying Key Viewpoints for Camera Placement
Choosing the right camera angles makes the bedroom design look better. Strategic placement helps emphasise depth, highlight essential design elements, and create a balanced composition for a more immersive visual experience.
The key pointers to keep in mind are as follows:
- Place cameras in corners to capture the entire room.
- Set the camera at a natural eye level (1.5m-1.7m) for a realistic perspective.
- Aim the camera to highlight key features like the bed, furniture, or lighting.
- Take close-up shots to show off textures, décor, and materials.
- Align the camera with the room’s lines to create a balanced, organised look.
Use top-down or straight-on views to try different angles before choosing the final one. Also, the proper field of view (FOV) should be kept to avoid distorting the image. Ensure that the camera doesn’t go through objects for a clear shot.
- Adjusting Camera Settings for Preferred Perspectives
After setting up the cameras, adjusting their settings helps create the right look. Tweaking parameters like focal length, depth of field, and exposure ensures optimal framing, realism, and visual appeal in the final render. The key techniques include:
- Field of View (FOV): Control how much of the room is visible. A wider FOV (24mm-35mm) works well for interior shots.
- Depth of Field (DOF): Use DOF to blur the background and focus on specific objects.
- Exposure & White Balance: Adjust exposure for the right brightness and colours.
- Perspective vs. Orthographic Views: Perspective cameras create realistic depth, while orthographic cameras provide technical views without distortion.
- Using Camera Tools to Enhance Realism and Composition
3ds Max has several camera tools and effects that make the scene more realistic and improve its appearance. These effects help create a more natural and visually compelling composition, improving the overall realism of the render. Some key effects include:
- Physical Cameras for Real-World Effects: Use V-Ray or Arnold Cameras to get real-world camera effects like motion blur and background blur. Adjust settings like ISO, shutter speed, and f-stop to mimic a DSLR camera.
- Rule of Thirds & Composition Guides: Use guides to align important elements based on the rule of thirds. Position key objects where the lines intersect for a balanced look.
- Animated Cameras for Walkthroughs: Use target cameras from Create Panel > Cameras > Target Camera with animated paths to create smooth walkthroughs. Add camera shake or focus changes for a cinematic effect.
- Clipping & Framing Adjustments: Adjust clipping to remove unwanted objects from the view. Tilt the camera for a more dynamic look while keeping it realistic.
- Finalising Camera Angles for Rendering
Before rendering the final image, do some test shots to check the framing and fix any issues. Create quick, low-res renders to check the composition and adjust angles, exposure, or focus.
Also, try different camera angles to find the best look for the scene by adjusting Target Cameras or Free Cameras from Create Panel > Cameras. Use the Viewport Camera Controls or manually move and rotate the camera in the Modify Panel to find the best composition for the scene.
Once the ideal camera angles are set, the final step is to bring everything together through rendering.
Rendering the Completed Bedroom Scene in 3ds Max
Rendering is the most crucial step in designing a bedroom in 3ds Max. This is where everything: models, textures, lighting, and camera settings—combines to create a high-quality, realistic image.
Ensure that your rendering settings are optimised for the best quality and presentation. For that, follow these steps:
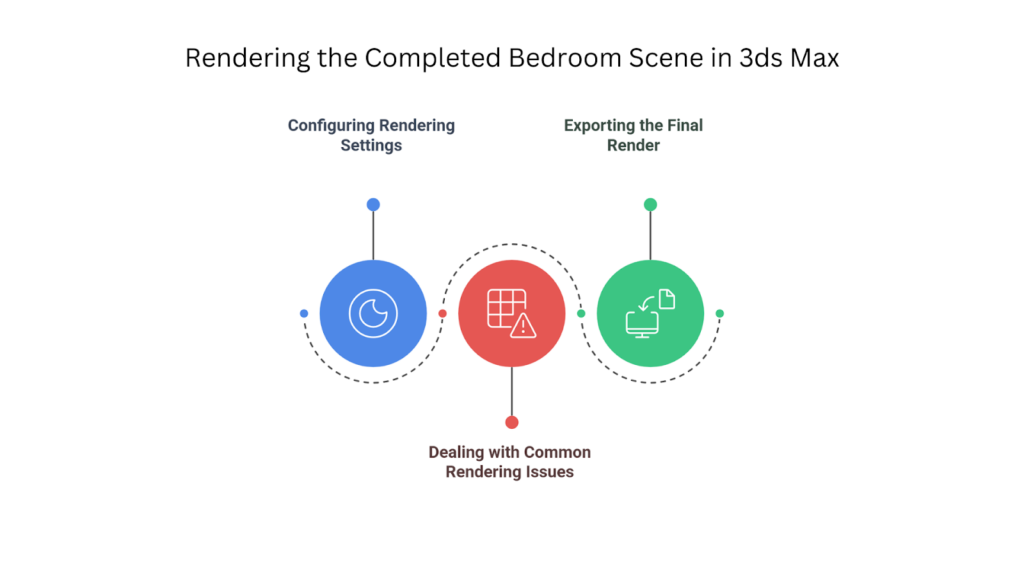
- Configuring Rendering Settings for High-Quality Output
Using the right rendering settings helps create realistic lighting, clear details, and smooth textures. The rendering engine you choose affects the final image’s quality and speed:
- V-Ray: Produces highly realistic images with excellent lighting control and noise reduction.
- Arnold: Built-in renderer that delivers photo-realistic quality and performs well in complex scenes.
- Corona Renderer: Easy to use with simple settings, offering accurate lighting and material realism.
After choosing the rendering engine, you need to optimise key rendering settings such as:
| Settings | Key Details |
| Resolution | Set the output to 1920×1080 (Full HD) or higher for clear, detailed images. |
| Sampling & Noise Reduction | Increase sample settings to reduce grainy textures and create smoother renders. |
| Global Illumination (GI) | Turn on GI to make light bounce naturally and improve shadow accuracy. |
| Ambient Occlusion (AO) | Add AO to enhance depth in corners and where objects meet. |
| Light Bounces | Increase light bounces for better reflections and a more realistic lighting effect in the room. |
Enable passes such as Z-depth, Reflection, and Ambient Occlusion to refine details in Photoshop. For V-Ray, go to Render Setup > V-Ray > Render Elements and add the desired elements. In Arnold, enable AOVs (Arbitrary Output Variables) in the Arnold Render Setup to export these passes.
- Dealing with Common Rendering Issues
Rendering can have issues that affect the final image quality. Addressing problems ensures a smooth, high-quality render with accurate details and realism. Some of the common problems and their solutions are as follows:
| Problems | Solutions |
| Noise or Grainy Renders | Adjust sampling settings and enable denoiser filters to minimise grainy spots.Opt for well-calibrated, high-intensity lights to enhance brightness and clarity instead of weak ones. |
| Overexposed or Underexposed Lighting | Modify light intensity and camera exposure settings to achieve balanced illumination.Fine-tune gamma settings to maintain natural brightness without overexposure. |
| Slow Rendering Times | Remove unnecessary high-detail objects to improve rendering performance.Lower these settings for materials that do not require high realism.Optimise repeated objects like furniture and decor to save memory and speed up rendering. |
| Blurry Textures or Low-Resolution Outputs | Apply 4K or 8K textures for sharper details and improved clarity.Ensure proper texture alignment to avoid stretching or distortion.Improve filtering settings to reduce blurriness and maintain sharpness. |
- Exporting the Final Render for Presentation
Once rendering issues are fixed, export the final image in the right format for presentation or client review. Choosing the appropriate resolution, file format, and compression settings ensures high-quality output suitable for print, web, or portfolio use.
Below is an overview of the factors you need to consider before exporting:
| Factors | Key Details |
| Choosing the Right File Format | PNG/TIFF is a high-quality format with no loss of detail and supports transparency.JPG is a compressed format that is ideal for sharing and online use.EXR is a high dynamic range format, suitable for advanced post-processing. |
| Saving in Different Resolutions | Full HD (1920×1080) is the standard resolution for screens and online viewing.4K (3840×2160) is high resolution, ideal for portfolios and professional presentations.8K (7680×4320) is ultra-high resolution, perfect for showcasing intricate details in professional settings. |
| Improving the Render in Post-Processing | Use Photoshop or After Effects to adjust colours, contrast, and focus to refine the final image.Add Bloom & Glare Effects to improve lighting realism for a more natural look.Add logos, text descriptions, or branding elements if required. |
| Creating Animations or Walkthroughs | Create a 3D walkthrough of the bedroom for an immersive presentation.Improve animations with smooth transitions and realistic focus shifts. |
Once the rendering is completed, the scene is nearly finished, but final touches can make a significant difference.
Final Touches and Post-Processing in 3ds Max
After rendering the bedroom interior, adjustments and post-processing help improve the image, making it look more realistic and polished. Small changes to lighting, colours, and composition can make a big difference.
By fine-tuning the details, using editing software, and reviewing the design, you can create high-quality results ready for presentation. The following steps will help perfect your final render:
- Refining Details to Enhance Realism
Even after rendering, small changes can make the scene look more realistic. Adjusting shadows, reflections, and minor imperfections adds depth and authenticity to the final image. The adjustments include:
- Adjusting Textures and Materials: Improve reflections, tweak bump maps, and add subtle imperfections like dust or fingerprints.
- Correcting Light and Shadows: Adjust softness, intensity, and glare for balanced lighting.
- Improving Composition and Camera Framing: Ensure framing highlights key features and maintains visual balance.
- Using Post-Processing Software for Adjustments
Post-processing improves the colours, sharpness, and exposure of the final image. Tools like Photoshop, After Effects, and Lightroom are commonly used. These tools allow for fine-tuning highlights, contrast, and colour grading, helping to achieve a more polished and visually appealing final render.
The adjustments include:
- Colour Correction and Grading: Adjust brightness, contrast, and saturation to set the right mood.
- Adding Effects for Realism: Apply depth of field, bloom, glare, and vignette for a natural look.
- Noise Reduction and Sharpening: Remove graininess and enhance texture clarity.
- Reviewing and Iterating on the Design
Before finishing the project, it’s important to review everything to ensure it matches the design vision. For reviews, follow these steps:
- Self-Review & Quality Check: Compare with real-world images to refine realism.
- Seeking Feedback from Peers or Clients: Ask colleagues, clients, or design experts for feedback on the design.
- Making Iterative Adjustments: Based on feedback, make changes to materials, lighting, or camera angles as needed.
Re-render only the parts that need adjustment, using render region tools to save time. Make sure the final render matches the project goals and design vision. BIM Supports GREEN EARTH.

Conclusion
Creating a realistic bedroom in 3ds Max requires careful planning, accurate modelling, and the right rendering techniques. Try different lighting, materials, and camera angles as you practice to make your scenes look even more real. Small details like tiny texture flaws, light reflections, and depth of field can make a big difference.
Also, staying updated on new tools, rendering engines, and AI features in 3ds Max will help you improve and keep up with the latest 3D design.
Are you looking for BIM Solutions?
BIM ASSOCIATES is your one-stop BIM Solution provider for Architecture and Structure. Their solutions help clients with better decision-making, cost-saving, efficient construction planning, and green earth initiatives.
BIM ASSOCIATES also helps customers create high poly, low poly, gaming facade models, 3d objects models, furniture, scenic renders, exterior, interior renders, animations and walkthrough with 3ds Max and Vray.
You might also like: Autodesk Revit 2025 Features & Benefits: A Detailed Guide.