The 3D rendering market in the UK is projected to reach an estimated £5,738.36M ($6,998 million) in 2025, underscoring the growing reliance on advanced visualisation technologies in architecture and design. At the heart of this growth lies 3D rendering—a transformative process that converts 3D models, materials, lighting, and camera setups into realistic or stylised images and animations.
Autodesk 3ds Max has become an indispensable tool for architectural professionals. This versatile software for 3D modelling, animation, and rendering offers powerful features specifically designed to meet the needs of architects. With robust rendering engines and advanced optimisation tools, 3ds Max enables the creation of photorealistic visualisations and immersive walkthroughs, bringing projects to life while enhancing client presentations.
This article explores the rendering essentials in 3ds Max, covering the core rendering engines, selection considerations, and configuration settings. In addition, you’ll explore the tools and techniques for optimising rendering efficiency and performance, offering insights on maximising output quality while minimising render times.
Understanding 3D Rendering in 3ds Max
3D rendering in 3ds Max transforms 3D models, textures, and lighting into realistic or stylised images and animations, enabling architecture, design, and entertainment professionals to bring their ideas to life.
3ds Max is a top choice for both beginners and professionals & is recognised as a leading software for 3D rendering. Its robust rendering engines, customisable settings, and optimisation tools empower creators to produce high-quality visuals efficiently.
Autodesk 3ds Max stands out for its:
- Core Rendering Engines: 3ds Max supports popular rendering engines like V-Ray, Arnold, and Redshift, each suited for different requirements.
- Customisation: It controls the rendering process, including materials, lighting setups, and render settings.
- Optimisation Tools: 3D Max’s built-in features for geometry reduction, texture management, and performance adjustments ensure smooth workflows, even for complex scenes.
These features make 3ds Max a versatile tool, enabling users to efficiently tailor workflows and rendering outputs to meet specific project demands. This versatility is particularly impactful in the construction industry, where 3ds Max rendering is vital in bringing designs to life, enhancing communication, and streamlining project workflows.
Importance of 3ds Max Rendering in the Construction Industry
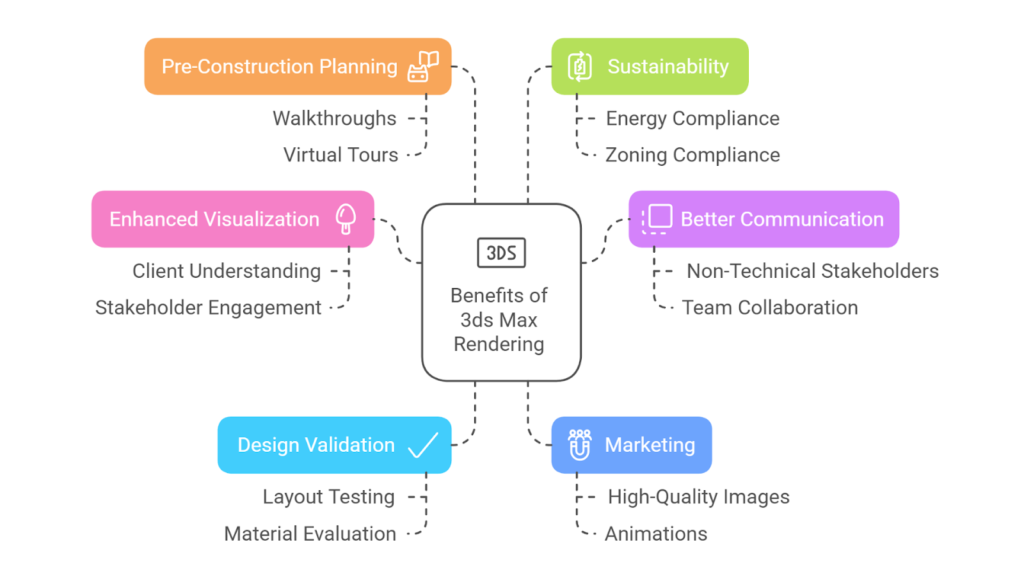
Research shows that 13.87% of people in the UK use 3ds Max, underscoring its pivotal role in the design and visualization industries. Particularly in construction, rendering in 3ds Max has revolutionized workflows by enabling professionals to create detailed, realistic visualizations that bring projects to life.
This powerful tool bridges the gap between initial concepts and final outcomes, enhancing communication, improving decision-making, and reducing errors. Its benefits extend across various stages of the construction process, including:
- Enhanced Visualisation: 3ds Max allows architects to create photorealistic representations of buildings, helping clients and stakeholders understand the project before construction begins.
- Better Communication with Stakeholders: Rendered visuals simplify complex designs, making it easier for non-technical stakeholders like clients and investors to understand the project, fostering collaboration among all teams.
- Design Validation and Problem-Solving: 3ds Max enables professionals to spot design flaws early and test various layouts, materials, and configurations to ensure the final design is functional and visually appealing.
- Marketing and Client Acquisition: High-quality rendered images and animations are effective marketing tools that help construction firms attract clients, showcase their vision, and win bids.
- Pre-Construction Planning and Efficiency: Rendered walkthroughs and virtual tours allow stakeholders to experience the project before it’s built, aiding in planning and decision-making and reducing costly on-site changes.
- Sustainability and Compliance: 3ds Max can simulate energy efficiency and help teams assess sustainability, making it easier to demonstrate zoning and aesthetic compliance to authorities.
By utilising 3ds Max, the construction industry benefits from enhanced communication, better planning, and improved presentations, leading to higher client satisfaction & successful project outcomes.
These advantages are made possible through the advanced rendering capabilities of 3ds Max, which leverage a suite of robust rendering engines tailored to meet the diverse and complex requirements of architectural and construction projects.
Core Rendering Engines in 3ds Max

3ds Max offers several powerful rendering engines to meet specific needs and workflows. Each engine is designed to handle specific challenges, whether producing detailed architectural renderings, crafting cinematic-quality animations, or optimising for fast, iterative designs.
The most popular core rendering engines in 3ds Max are as follows:
1. V-Ray
V-Ray, developed by Chaos, is renowned for its perfect balance of speed and quality, making it a preferred rendering engine among architects. Its advanced global illumination techniques enable realistic lighting simulations, while the powerful material editor allows for precise customisation of textures and finishes to replicate real-world materials.
Architects rely on V-Ray to produce photorealistic visualisations of exteriors, interiors, and landscapes, helping clients visualise designs with exceptional clarity and detail.
The features of V-Ray are as follows:
| Features | Key Details |
| Hybrid Rendering | Supports both CPU and GPU rendering, allowing flexibility based on hardware and project needs. |
| Advanced Global Illumination (GI) | Provides realistic lighting with multiple GI techniques such as Brute Force, Light Cache, and Photon Mapping. |
| Extensive Material Library | Offers a vast library of ready-to-use materials and supports procedural textures for custom creation. |
| Tight Integration with 3ds Max | Seamless workflow with interactive rendering and real-time viewport previews for efficient iteration. |
2. Redshift
Redshift is a GPU-accelerated renderer built for high-performance rendering without sacrificing quality. It is known for its speed, which allows architects to work efficiently and enables quick iterations of complex designs and visualisations.
Its ability to handle detailed architectural models, advanced lighting setups, and high-quality materials makes it a valuable tool for creating photorealistic renders of buildings and interiors.
The features of Redshift are as follows:
| Features | Key Details |
| Optimised for GPU Rendering | Delivers speedy render times by leveraging GPU acceleration. |
| Customisable Sampling and Memory Management | Allows fine-tuning of resources to handle complex and high-detail scenes efficiently. |
| Supports Advanced Effects | Includes features like motion blur, volumetrics, and subsurface scattering for realistic visuals. |
| Scalable for Large Projects | Designed to manage high polygon counts, making it ideal for large-scale and detailed projects. |
3. Arnold
Arnold, created by Autodesk, is a production-proven, physically-based renderer renowned for its high-quality output. While widely used in film and television, Arnold is also an excellent choice for architects seeking to produce photorealistic visualisations.
Its ability to handle complex scenes with realistic lighting, shadows, and shading makes it ideal for creating detailed renderings of architectural designs.
The features of Arnold are as follows:
| Features | Key Details |
| Ray-Tracing Engine | Built to produce high-quality, detailed outputs with accurate lighting and shading. |
| Seamless Integration with 3ds Max | Offers an artist-friendly workflow with native support in Autodesk products. |
| Adaptive Sampling and Denoising | Optimises performance by reducing noise and improving render efficiency. |
| Advanced Visual Effects | Excels in creating photorealistic renders with advanced lighting, materials, and volumetrics, making it ideal for high-quality architectural visualisation. |
4. Corona Renderer
Corona Renderer is a top choice for architects in architectural visualisation and interior design due to its user-friendly interface and exceptional photorealism. Its intuitive workflow allows architects to set up scenes quickly and achieve stunning, lifelike results with minimal effort.
Corona’s physically-based materials and advanced global illumination techniques deliver realistic lighting and textures, bringing architectural designs to life.
The features of Corona Renderer are as follows:
| Features | Key Details |
| Interactive Rendering | Provides instant visual feedback, allowing for quick adjustments during the design process. |
| Physically-Based Materials | Ensures accurate real-world simulations of materials and surfaces for photorealistic results. |
| User-Friendly Interface | Designed to lessen the learning curve, making it accessible to beginners and professionals. |
| Progressive Rendering | Delivers quick previews and supports iterative adjustments to refine the final output efficiently. |
Each rendering engine integrates seamlessly with 3ds Max, empowering creators to produce high-quality visuals tailored to their project needs. Choosing the right rendering engine is crucial for optimising workflows and achieving the desired results, as each engine offers unique features suited to specific project requirements.
Looking to elevate your projects with 3ds Max rendering tools?
BIM ASSOCIATES helps you 3D-model your objects, furniture, buildings, and landscapes in high poly/low poly and enables you to create scenic renders and videos. Their 3d models are AR ready.
Considerations for Selecting a Rendering Engine
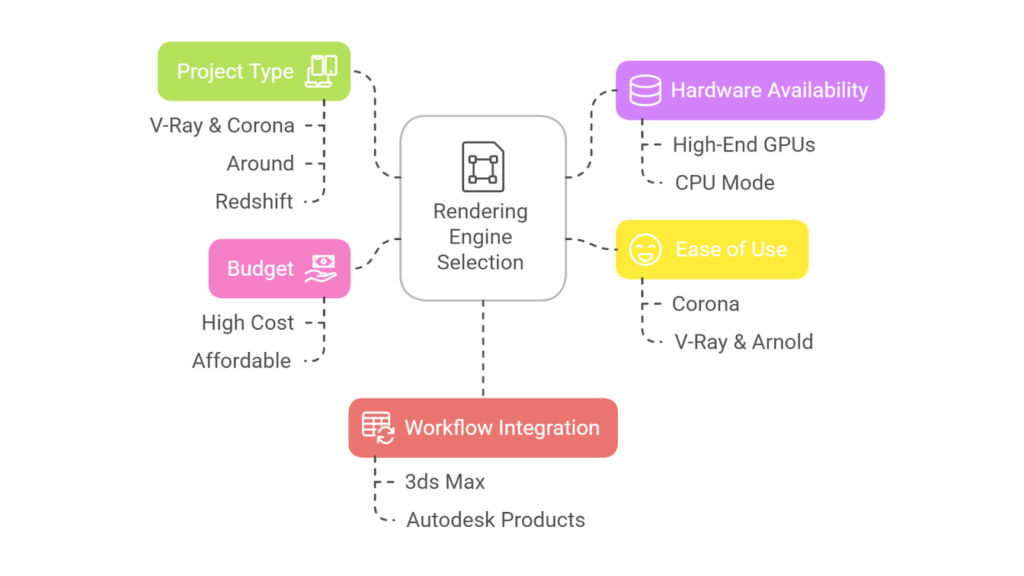
Choosing the right rendering engine in 3ds Max is crucial and depends on project scope, technical requirements, and hardware availability. Each rendering engine has unique features and strengths, making it essential to align its capabilities with your project’s needs.
When selecting a rendering engine, consider these key factors:
- Project Type: V-Ray and Corona Renderer offer photorealistic rendering and user-friendly features. Arnold is ideal for handling complex, high-quality scenes with realistic lighting and effects. Whereas, Redshift provides speed and efficiency, perfect for projects with frequent iterations.
- Hardware Availability: Engines like Redshift and V-Ray GPU perform best with high-end graphics cards, delivering faster results. Whereas, Arnold and V-Ray’s CPU mode handles detailed scenes effectively and is suitable for setups with limited GPU resources.
- Ease of Use: Corona Renderer’s simplicity makes it easy to learn and use. On the other hand, V-Ray and Arnold provide extensive control for experienced artists.
- Budget: V-Ray and Arnold offer robust capabilities at a higher cost. Meanwhile, Corona Renderer is more affordable and ideal for freelancers and smaller studios.
- Workflow Integration: Consider how well the engine integrates with 3ds Max and other tools in your workflow. For instance, Arnold integrates seamlessly with Autodesk products, and V-Ray offers compatibility with multiple software platforms.
Understanding the strengths of each rendering engine and aligning them with your project’s requirements allows you to streamline your workflow and produce outstanding visual results with efficiency.
Rendering Configurations in 3ds Max
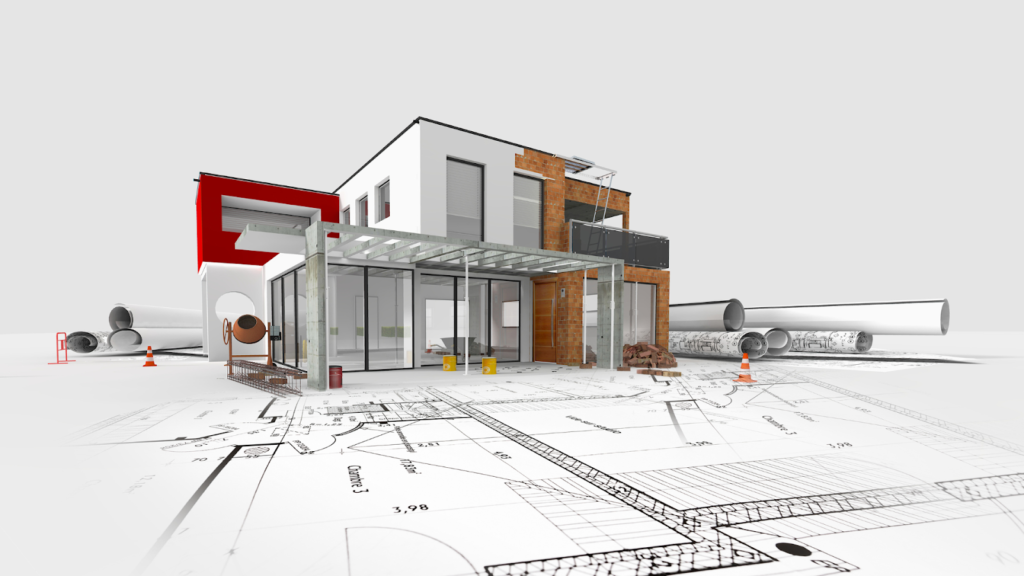
Rendering configuration in 3ds Max sets the parameters for processing your 3D scene into a final image or animation.
Adjust settings like resolution, sampling, global illumination, and output formats to balance visual quality with efficiency tailored to your project’s needs. Optimizing these ensures a streamlined workflow and professional results.
To achieve these professional standards, it’s essential to understand the process of rendering a still image in 3ds Max, from scene setup to final output configuration.
Rendering a Still Image in 3ds Max
Rendering a still image in 3ds Max involves transforming a 3D scene into a single, high-quality visual representation. You can refine the scene by performing test renders at low resolutions before finalising the output.
To render a still image in 3ds Max, you need to follow these steps:
- Prepare the Scene: Ensure all objects are accurately modelled, textured, and positioned. Apply suitable materials and shaders to surfaces. Set up cameras to frame the scene composition effectively.
- Lighting Setup: Add and adjust light sources to illuminate the scene properly. Use global illumination (GI) or HDRI lighting for realistic effects.
- Configure Render Settings: Open the Render Setup dialog (F10). Select the desired rendering engine (e.g., V-Ray, Arnold, or Corona Renderer). Set the resolution in the Output Size section. Adjust render quality settings, such as sampling, anti-aliasing, and global illumination.
- Test Render: Perform a low-resolution test render to review lighting, materials, and composition. Make adjustments as needed.
- Final Render: Select the output file format in the Render Output section (e.g., PNG, EXR, or JPG). Specify the save location and start the rendering process.
Following these steps ensures efficient rendering of high-quality still images in 3ds Max. Extending this process, rendering an animation involves additional steps to incorporate motion and create dynamic, engaging visuals.
Rendering an Animation in 3ds Max
Rendering an animation in 3ds Max involves generating a sequence of frames to create motion, bringing 3D scenes and objects to life. Test renders of individual frames or low-resolution previews help refine the animation before final rendering.
To render an animation in 3ds Max, follow these steps:
- Animate the Scene: Create and keyframe animations for objects, cameras, or lights. Use the timeline to adjust the animation duration and playback settings.
- Lighting and Camera Setup: Ensure lighting and camera movements are smooth and consistent throughout the animation.
- Configure Render Settings: Open the Render Setup dialog. Choose the rendering engine and set the resolution in the Output Size section. In the Time Output section, specify the frame range to render (e.g., Active Time Segment or Specific Frames).
- Test Animation: Render a few frames or a low-resolution preview animation to check motion, lighting, and timing.
- Specify Output Settings: Choose an appropriate output file format. Image Sequence (e.g., PNG, TGA) for flexibility in post-production. Video File (e.g., AVI, MP4) for quick review or final output.
- Render Animation: Start rendering, ensuring sufficient storage and system resources for large sequences.
Following these steps can help you create high-quality animations in 3ds Max that are ready for review or post-production. Once your animation is complete, achieving high-quality output depends on understanding and configuring key rendering settings in 3ds Max for optimal results.
Key Rendering Settings for High-Quality Output
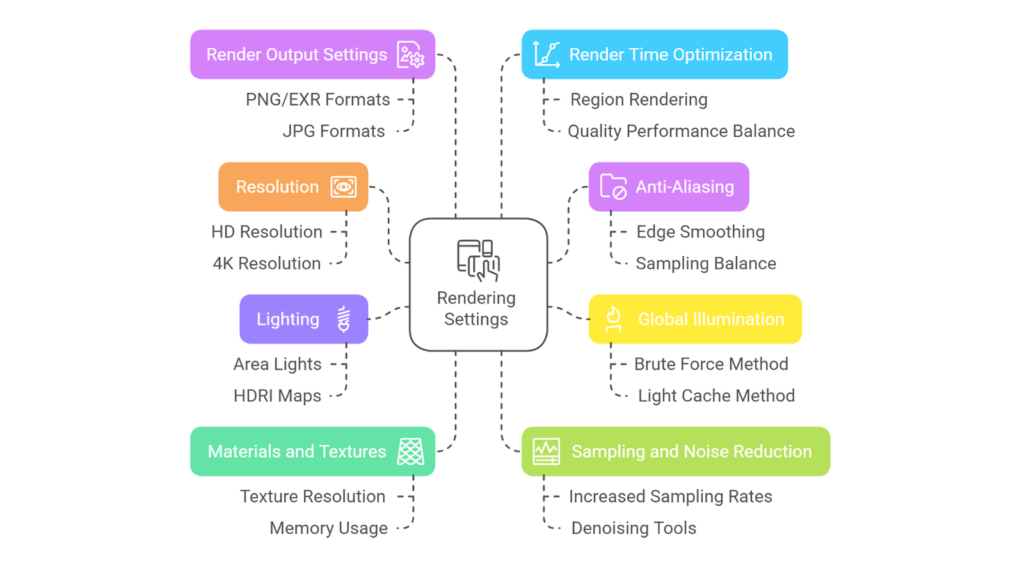
Rendering settings in 3ds Max are essential for achieving high-quality output while maintaining efficiency. Adjusting these settings based on project needs ensures professional-grade visuals that balance quality and performance.
Here are the key rendering settings for high-quality output:
- Anti-Aliasing: Enable anti-aliasing to smooth edges and minimise visual artefacts. Also, sampling settings should be configured to balance rendering speed and quality.
- Global Illumination (GI): Use GI to simulate realistic light behaviour. Combine efficient methods (e.g., Brute Force + Light Cache in V-Ray) for faster renders.
- Lighting: Optimise lighting with area lights and HDRI maps for natural illumination. Limit the number of light sources to reduce render times.
- Materials and Textures: Use optimised materials and textures. Match texture resolution to render size to avoid unnecessary memory usage.
- Sampling and Noise Reduction: Increase sampling rates to reduce noise in the render. Use the denoising tools available in the render engine to produce cleaner outputs.
- Render Output Settings: Select the appropriate file format. PNG or EXR is for high-quality outputs with transparency support, and JPG is for lightweight results. Image sequences are best for animations, allowing flexibility in post-production.
- Render Time Optimisation: Use region rendering to test specific areas of the scene. Adjust render settings to balance quality and performance (e.g., reduce reflection depth for draft renders).
By configuring these settings carefully, you can efficiently achieve high-quality renders tailored to your project’s requirements. To further enhance efficiency and streamline your workflow, it’s essential to explore the tools and considerations available for rendering optimisation in 3ds Max.
Also read: SD, DD, and CD Drawings Explained for Successful Construction.
Tools & Considerations for Rendering Optimisation in 3ds Max
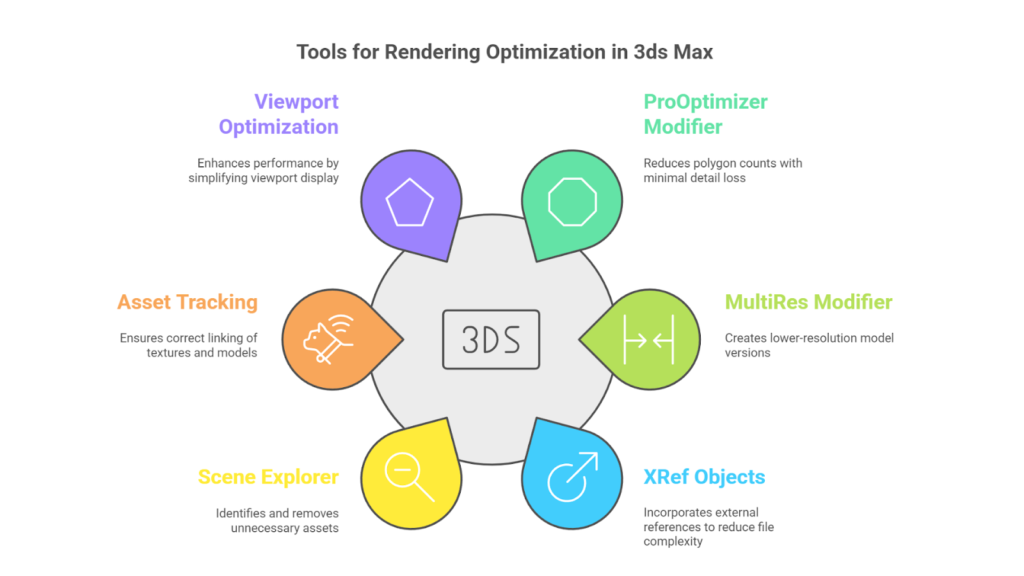
Rendering optimisation in 3ds Max focuses on improving the efficiency and performance of the rendering process. Proper optimisation enhances workflows, improves system performance, and maximises hardware efficiency, making it especially valuable for managing complex scenes or meeting tight project deadlines.
You can use different tools to achieve high-quality results while minimising render times and resource usage, such as:
| Tools | Key Details |
| ProOptimiser Modifier | Reduces polygon counts with minimal loss of detail, making it ideal for simplifying high-poly models. |
| MultiRes Modifier | Generates lower-resolution versions of models, perfect for creating Levels of Detail (LODs). |
| XRef Objects | Incorporates external references into the scene, reducing the size & complexity of the main file. |
| Scene Explorer | Identifies high-poly objects, hidden geometry, and unnecessary assets for removal or optimisation. |
| Asset Tracking | Ensures textures, models, and other assets are correctly linked and optimised, preventing missing or redundant data. |
| Viewport Optimisation | Improves performance in complex scenes by setting the viewport to display as Bounding Box or Simplified Geometry. |
These tools can significantly improve performance and streamline workflows, especially for large or detailed projects. Optimising performance also depends on hardware and system capabilities crucial in handling complex scenes and achieving efficient rendering in 3ds Max.
Hardware and System Considerations
Hardware and system considerations are critical for optimising rendering performance in 3ds Max. You can maximise rendering efficiency and achieve high-quality results by aligning system capabilities with project requirements.
The hardware and systems to be considered for optimising rendering performance are as follows:
- GPU Rendering: Use GPU-based rendering engines, such as Redshift or V-Ray GPU, to significantly accelerate render times while maintaining quality.
- RAM Management: For small to medium scenes, 16–32 GB of RAM generally meets the requirements. For larger, more intricate projects with high-resolution textures or simulations, 64 GB or more is advisable. Compress textures and use proxies to reduce memory usage and improve performance.
- Distributed Rendering: Implement network rendering to distribute rendering tasks across multiple machines, speeding up output and reducing individual system strain.
These considerations help optimise rendering performance in 3ds Max, ensuring efficient resource utilisation and faster output, even for complex projects. By applying targeted rendering optimisation techniques, you can further enhance performance, streamline workflows, and quickly achieve high-quality results.
Techniques for Rendering Optimisation in 3ds Max
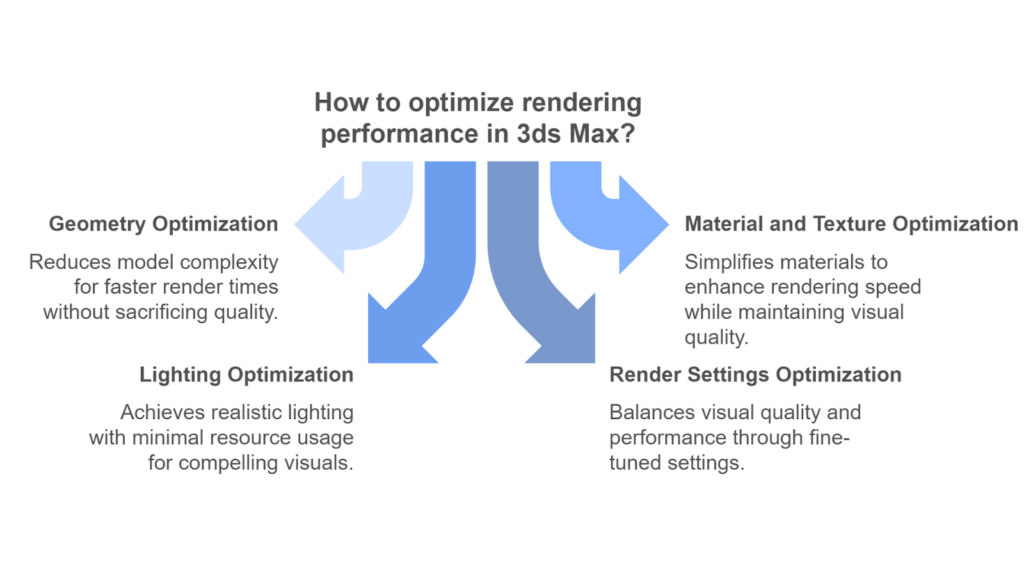
Rendering optimisation in 3ds Max involves applying strategies to enhance efficiency, reduce resource usage, and achieve faster render times without compromising visual quality. You can balance performance and quality using rendering optimisation techniques to achieve professional-grade results that meet project requirements.
The techniques for rendering optimisations in 3ds Max are as follows:
1. Geometry Optimisation
Geometry optimisation in 3ds Max focuses on reducing the complexity of 3D models to improve rendering performance without sacrificing visual quality. These practices streamline workflows and enable faster render times, especially for large or complex scenes.
For geometry optimisation, you can follow these strategies:
| Techniques | Key Details |
| Polycount Reduction | Use tools like the ProOptimiser Modifier or MultiRes Modifier to lower polygon counts while preserving the visual integrity of models. |
| Instances and Proxies | Replace duplicate objects with instances or proxies, which share geometry data to reduce memory usage and render times significantly. |
| Level of Detail (LOD) | Apply LOD techniques to display low-resolution models for objects distant from the camera while retaining detailed models for close-up views. |
| Culling Hidden Geometry | Remove or hide objects not visible in the camera’s view to avoid unnecessary rendering calculations and improve efficiency. |
2. Material and Texture Optimisation
Material and texture optimisation in 3ds Max ensures efficient resource usage while maintaining high-quality visuals. Simplifying materials by reducing overly complex shaders and limiting reflective or refractive properties can improve rendering speed.
You can optimise material and texture in the following ways:
| Techniques | Key Details |
| Simplify Materials | Avoid using overly complex shader networks, and minimise using reflective, refractive, or translucent materials whenever possible. |
| Texture Resolutions | Use lower-resolution textures for background objects and tileable textures to conserve memory and improve performance. |
| Efficient UV Mapping | Optimise UV layouts to apply textures efficiently, avoiding stretching or overlapping for better quality and resource management. |
3. Lighting Optimisation
Lighting optimisation in 3ds Max focuses on achieving realistic illumination while minimising render times and resource usage. These practices ensure visually compelling results while maintaining smooth workflows and faster render times.
You can optimise lighting by following these techniques:
| Techniques | Key Details |
| Limit Light Sources | Minimise the number of lights in the scene, and use area lights or HDRI maps for more even and efficient illumination. |
| Global Illumination (GI) | Choose efficient GI methods, such as Light Cache in V-Ray or Path Tracing in Arnold, and reduce secondary bounces where possible to improve render efficiency. |
| Adaptive Sampling | Adaptive sampling directs rendering power to areas with higher detail or complexity, improving render speed while maintaining quality. |
4. Render Settings Optimisation
Optimising render settings in 3ds Max involves fine-tuning parameters to balance visual quality and performance. These adjustments streamline workflows and deliver professional results without unnecessary delays.
Here are the ways to optimise render settings:
| Techniques | Key Details |
| Resolution and Output Settings | Set the render resolution according to the project requirements and avoid rendering at unnecessarily high resolutions. |
| Sampling and Noise | Increase sampling rates only in areas with visible noise, and use denoising tools to clean up the final render. |
| Test Renders | Perform low-resolution test renders to evaluate settings and make adjustments before proceeding with full-resolution renders. |
| Render Elements | Break the render into passes (e.g., diffuse, reflections, shadows) to make post-production adjustments easier. |
These techniques can streamline your rendering workflow in 3ds Max, ensuring efficient performance and exceptional visual quality for any project.
While these techniques greatly enhance rendering workflows, addressing common challenges during rendering in 3ds Max is equally important to improve performance and efficiency.
Overcoming Rendering Challenges in 3ds Max: Solutions for Improved Performance
Rendering in 3ds Max can be resource-intensive, especially when working with complex scenes or high-quality outputs. However, these obstacles can be effectively managed through strategic geometry, materials, lighting, and render settings optimisations.
The solutions to these challenges are as follows:
| Challenges | Solutions |
| High RAM Usage | Optimise textures by reducing the resolution for background objects and compressing files. Use proxy objects for complex models to save memory. |
| Lengthy Render Times | Use GPU-based rendering engines like Redshift or V-Ray GPU for faster performance. Optimise global illumination and sampling settings for improved render speed. |
| Large File Sizes | Remove unused objects, textures, and animation keys. Use external references (XRefs) to manage large assets more efficiently. |
| Noise and Artifacts | Increase sampling in critical areas and use the rendering engine’s denoising tools to reduce noise and artefacts. |
| Hardware Limitations | Upgrade your hardware, utilise distributed rendering across multiple machines, or use cloud-based rendering services to improve performance. |
Leverage efficient tools and techniques to enhance rendering performance, streamline workflows, and achieve professional-grade results with greater efficiency. BIM Supports GREEN EARTH.

Conclusion
3D rendering in 3ds Max transforms concepts into realistic visuals, which is crucial for industries like architecture, design, and entertainment. Key practices include scene optimisation, efficient use of rendering engines and balancing quality with performance. To integrate rendering seamlessly, focus on iterative test renders, optimise resources, and tailor settings to project needs.
Continued learning and experimentation with advanced techniques and tools will expand your expertise and enable you to create professional, impactful renders. Approach rendering as a blend of creativity and technical knowledge, and challenge yourself to reach new heights.

Sample Image: Modeling, Texturing, Lighting, and Scene Creation with render done in 3ds Max and Vray NXT.
Are you looking for BIM solutions?
BIM ASSOCIATES is your one-stop BIM Solution provider for Architecture and Structure. Their solutions help clients with better decision-making, cost-saving, efficient construction planning, and green earth initiatives.
You might also like: Autodesk Revit 2025 Features & Benefits: A Detailed Guide.
FAQs (Frequently Asked Questions)
1. How to get the best render quality in 3ds Max?
The render settings in 3D Max control the quality and resolution of the final output. Adjusting these settings can enhance the render quality while reducing render times. To optimise your scene, consider adjusting the image resolution, antialiasing, and quality settings to achieve the desired balance between quality and efficiency.
2. How can I improve my render quality?
Rendering quality can be enhanced by using higher resolutions, increasing the number of samples, and applying more complex shading and lighting models. Additionally, incorporating realistic shadows, reflections, and refractions, higher-quality textures, and advanced post-processing effects can significantly improve the final result.
3. Is 3ds Max used for VFX?
Creative studios worldwide use 3ds Max and Maya for animation, modelling, visual effects, and rendering tasks.

